
Defending the Mesh Concept


Friday night, while most of you were grinding through game night, I was at home watching my Seminoles drop one to Virginia. Tough to stomach, but one thing stood out beyond the final score: Florida State had no answer for mesh. The Cavaliers leaned into it on critical downs, and it worked. Mesh, and its variations, are a week-one install for a reason. It’s timeless. Offenses know it gets open, especially versus man and soft zone. But the question is, how do you fight back when you know mesh is coming on third down? In this article, I’ll walk through the ways we’ve handled mesh over the years and what worked for us on Friday nights.
In a perfect world, you’re in Cover 2 against mesh. It’s the best-case scenario. You’ve got two high safeties taking away the post-snap shot, and your underneath defenders can squeeze down on the outside drag with vision on the quarterback. Of course, you don’t always get that luxury. But if scouting gives you a tell like formation, motion, or backfield alignment, and you have a good feel for mesh coming on a key down, I want to be in some version of Cover 2.
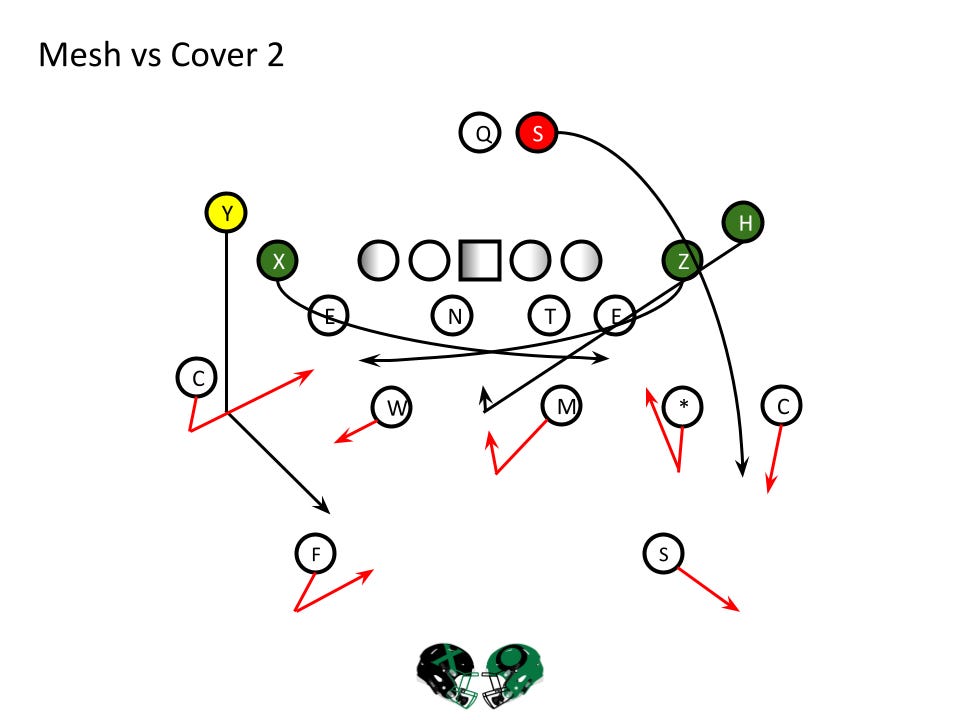
Above is a breakdown of how we played Cover 2 against 2x2 mesh-rail. With five underneath defenders, we’re able to match the crossers, sit on the spot route, and cover anything leaking out of the backfield. It gives us zone eyes, but we always worked to match after the route distribution.
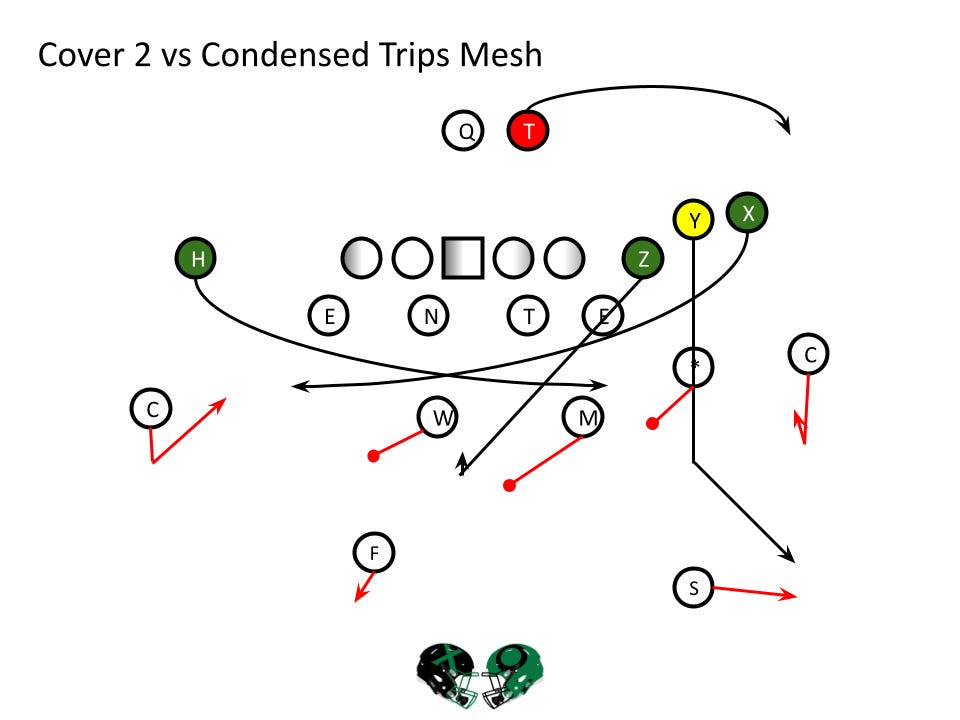
Here it plays out the same way against mesh from a tight trips set. We have enough underneath defenders to handle the crossers, match the post, and rally to the swing out of the backfield. The structure holds up because we are not chasing routes. We are closing space and playing with leverage.
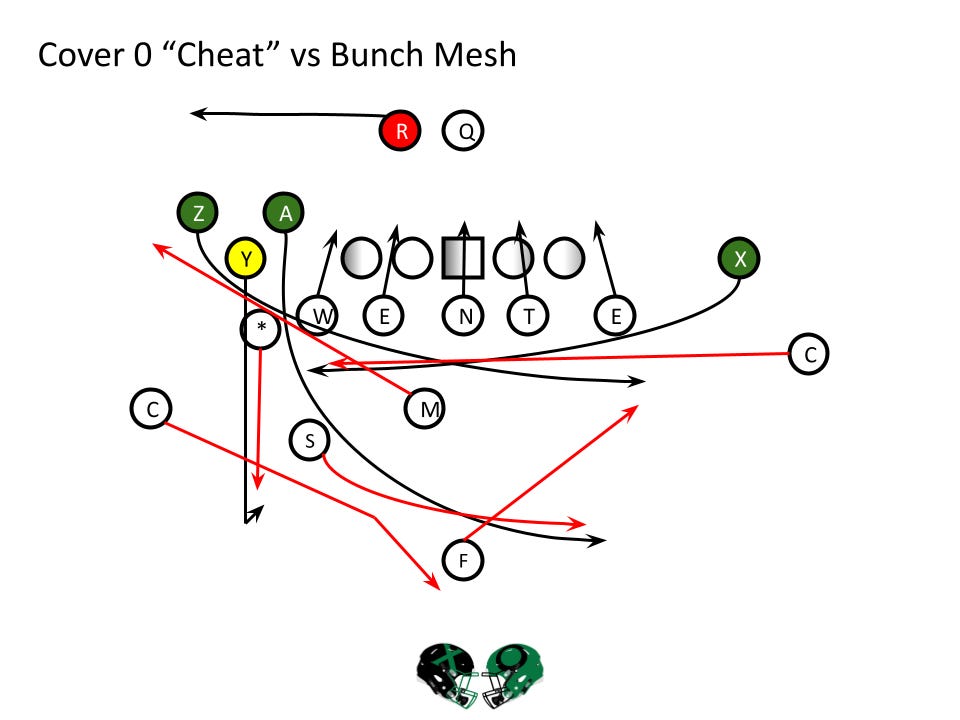
Mesh versus Cover 0
Here, Florida State brings five and plays what I call Cover 0, man across the board with a single high safety and no rat in the hole. Mesh is built to beat this. That strong crosser gets under everything and forces the corner to fight over top through a lot of traffic. So what is the fix? Against teams with little vertical threat, like Virginia on Friday night, we ran a version of Cover 0 or Cover 1 with a “cheat” tag. That tag tells the free safety to cut the first crosser moving from strong to weak. We do not need to cut the weak side crosser, because that corner should have a cleaner path and less traffic to navigate.
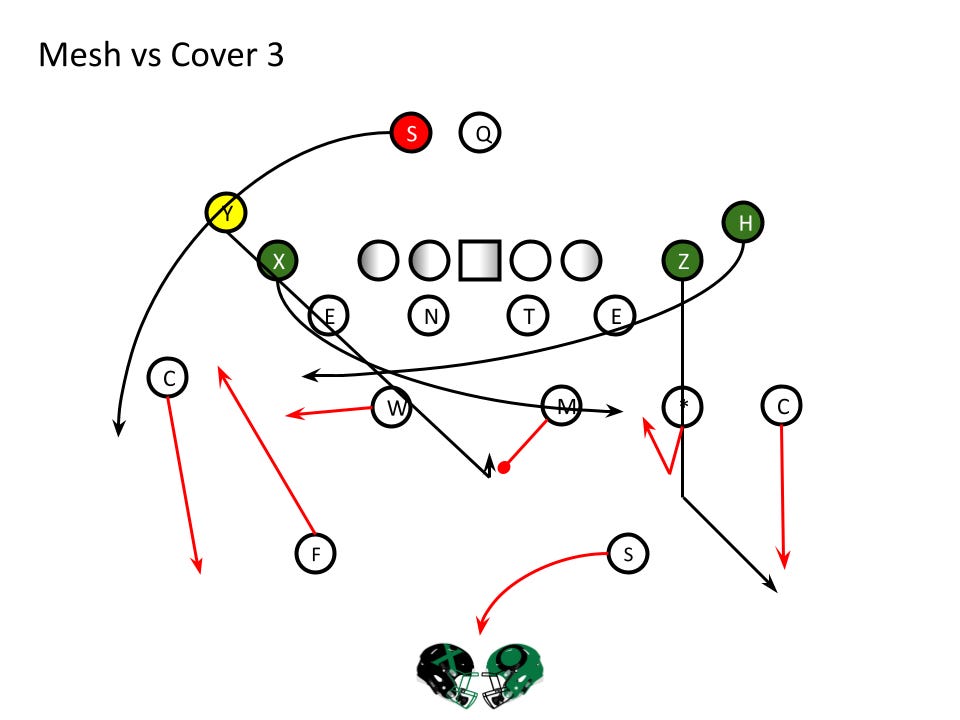
Mesh versus Cover 3
Florida State rotates to Cover 3 Buzz, rotating weak, against mesh. I do not love the route distribution here. With the running back releasing to the boundary, the coverage should push that way too. If the buzz safety sits on the spot route, then the Mike is stuck chasing the weak side crosser. That is what happens here, and he is late. A better distribution would have the buzz safety match the crosser and the Mike handle the spot. That way, you are not asking a linebacker to chase across the field.
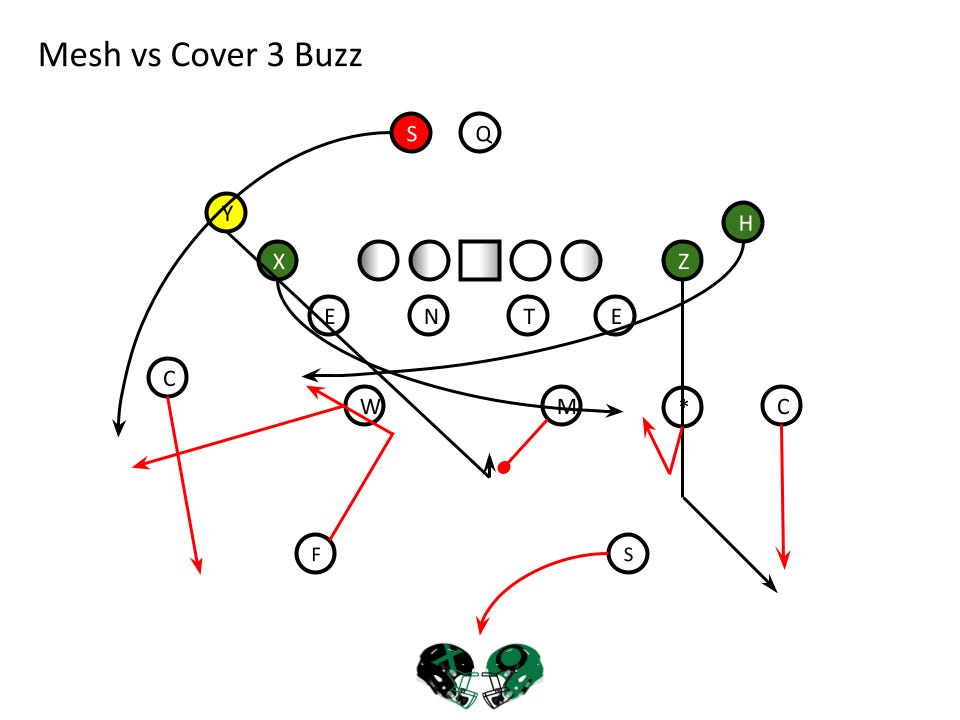
However, at the high school level, especially on coverage downs, I preferred a “sky” look with the safety rotating down outside. This gave us better leverage on the flat and allowed the linebackers and Star to pass off the mesh routes the same way they would in Cover 2. It simplified the picture for our players and helped them play faster.
Mesh is a pain. Offenses love it because it creates traffic, punishes man, and forces communication in zone. But that does not mean defenses are helpless. With good scouting and smart structure, you can build answers. Whether you’re leaning on Cover 2, tagging the safety in Cover 0, or building match principles into your zone tools, the key is to anticipate it and train your guys to handle the rub. Know what you’re seeing, communicate across levels, and don’t chase ghosts. Make the offense earn every yard.
How are you defending mesh on Friday nights? Tag us or reply with your favorite tools. Let’s keep building better answers together.